
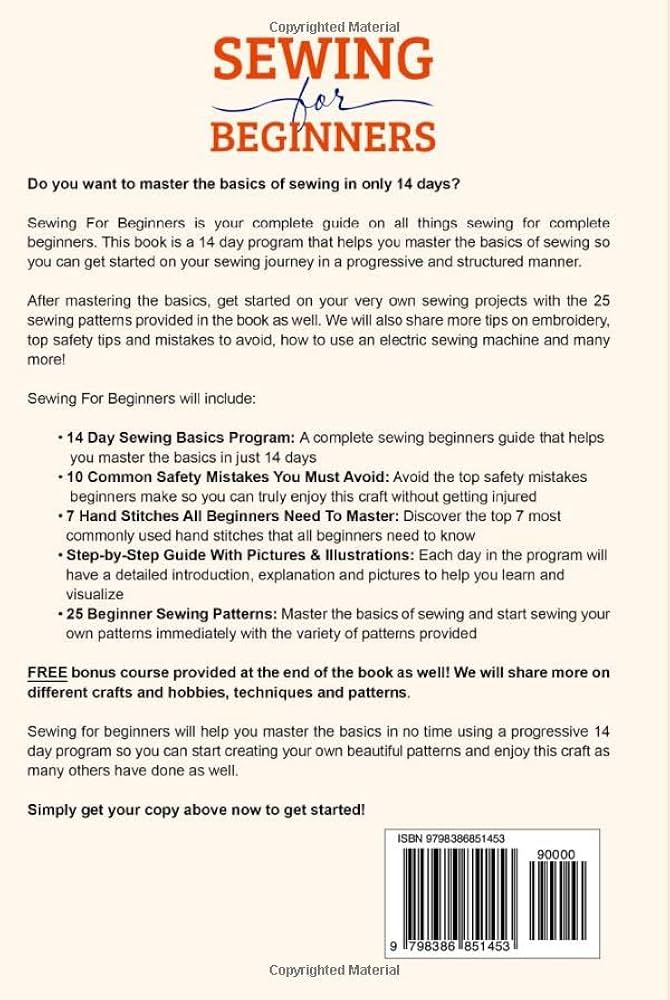
Sewing for Beginners: A Comprehensive Guide to Getting Started
Sewing for beginners can be both fun and rewarding. This guide helps you start your sewing journey with ease.
Sewing is a creative and practical skill. Beginners often feel overwhelmed, but starting with basic techniques and tools makes it manageable. You only need a few essentials to get going: a sewing machine, fabric, thread, and basic sewing notions. Practice simple projects like pillowcases or tote bags to build confidence.
As you gain experience, you can tackle more complex patterns and fabrics. Sewing not only allows you to create unique items but also helps you repair and customize clothing. This guide provides step-by-step instructions, tips, and resources to make your sewing experience enjoyable and successful. Dive in and discover the joy of sewing today!
Credit: www.amazon.com
Embarking On Your Sewing Journey
Starting your sewing journey is exciting and fun. This guide helps you begin. You will learn the basics and enjoy sewing. Let’s dive into the essentials.
Choosing The Right Tools
Having the right tools is key to your success. Here are the must-haves:
- Sewing Machine: A beginner-friendly machine is ideal.
- Fabric Scissors: Keep them sharp and only for fabric.
- Measuring Tape: Essential for accurate measurements.
- Pins and Needles: Different types for various fabrics.
- Thread: Choose all-purpose thread in various colors.
- Seam Ripper: Fix mistakes easily with this tool.
Setting Up Your Sewing Space
Your sewing space should be organized and comfortable. Consider these tips:
- Choose a Quiet Spot: Find a place with minimal distractions.
- Good Lighting: Ensure you have bright, clear lighting.
- Comfortable Chair: Use a chair that supports your back.
- Organize Tools: Keep tools within easy reach.
- Storage Solutions: Use bins and boxes for fabric and tools.
Here’s a quick look at how to organize your space:
| Item | Storage Tip |
|---|---|
| Fabric | Store in bins or on shelves. |
| Tools | Use a pegboard or small drawers. |
| Patterns | Organize in folders or binders. |
With these tips, your sewing space will be ready for creativity.
Understanding Sewing Machines
Sewing machines are essential tools for any sewing enthusiast. They help you stitch fabric together quickly and accurately. Understanding how they work is the first step to becoming a skilled sewist. This section will guide you through the basics of sewing machines.
Types Of Sewing Machines
There are several types of sewing machines available. Each type serves different sewing needs. Here are the main categories:
- Mechanical Sewing Machines: These are the simplest types. They use manual controls like dials and knobs.
- Electronic Sewing Machines: These machines have electronic controls. They offer more precision and various stitch options.
- Computerized Sewing Machines: These are advanced machines. They come with programmable stitch patterns and an LCD screen.
- Overlockers (Serger Machines): These machines are used for finishing edges. They cut and stitch at the same time.
| Type | Features |
|---|---|
| Mechanical | Simple, durable, manual controls |
| Electronic | Electronic controls, more stitch options |
| Computerized | Programmable, LCD screen, advanced features |
| Overlockers | Edge finishing, cuts and stitches |
Basic Machine Operation
Learning how to operate a sewing machine is crucial. Here are the basic steps:
- Threading the Machine: Follow the guide on your machine. Make sure the thread passes through all necessary points.
- Winding the Bobbin: Place the thread on the bobbin. Use the bobbin winder to fill it.
- Inserting the Bobbin: Place the bobbin in its case. Pull the thread through the slit.
- Setting the Stitch: Choose your stitch type and length. Use the machine’s controls to set it up.
- Starting to Sew: Place the fabric under the presser foot. Lower the presser foot and press the foot pedal to start sewing.
Practice these steps to become comfortable with your sewing machine. Remember, each machine may have unique features and controls. Always refer to your machine’s manual for specific instructions.
Fabrics And Materials
Starting with sewing involves understanding fabrics and materials. Knowing the right fabric can make your project successful. This section will guide you through identifying and selecting fabrics for your projects.
Identifying Different Fabrics
Fabrics come in different types, each with unique characteristics. Here are some common fabrics:
- Cotton: Soft, breathable, and easy to work with.
- Polyester: Durable, wrinkle-resistant, and often blended with other fabrics.
- Silk: Smooth, luxurious, and slightly challenging for beginners.
- Linen: Lightweight, breathable, but can wrinkle easily.
- Wool: Warm, good for winter clothes, but can shrink when washed.
Use the table below to understand the differences better:
| Fabric | Characteristics | Best Used For |
|---|---|---|
| Cotton | Soft, breathable, versatile | Shirts, dresses, quilts |
| Polyester | Durable, wrinkle-resistant, affordable | Sportswear, outerwear, home decor |
| Silk | Smooth, luxurious, delicate | Evening wear, scarves, ties |
| Linen | Lightweight, breathable, crisp | Summer clothes, tablecloths, napkins |
| Wool | Warm, insulating, stretchy | Coats, sweaters, blankets |
Selecting Fabrics For Projects
Choosing the right fabric for your project is crucial. Here are some tips:
- Consider the Project: Think about what you are making. For a summer dress, use lightweight fabrics like cotton or linen.
- Skill Level: Beginners should start with easy-to-handle fabrics like cotton.
- Pattern Recommendations: Follow the fabric suggestions on your sewing patterns.
- Color and Print: Choose colors and prints that match your style and project.
- Care Instructions: Check if the fabric is machine washable or requires special care.
By following these tips, you can ensure that your sewing projects are successful and enjoyable.

Credit: m.youtube.com
Basic Sewing Techniques
Learning basic sewing techniques is essential for beginners. These skills will form the foundation of your sewing journey. Whether you are hand sewing or using a machine, mastering these basics will make your projects successful.
Hand Sewing Essentials
Hand sewing is a fundamental skill. It is crucial for small repairs and detailed work. Here are some essential hand sewing techniques:
- Threading the Needle: Cut the thread at an angle. This makes it easier to thread.
- Knots: Tie a knot at the end of your thread. This prevents it from slipping through the fabric.
- Running Stitch: This is the most basic stitch. It is used for simple seams and gathering fabric.
- Backstitch: This stitch is stronger than the running stitch. It is used for seams that need more strength.
- Slip Stitch: This stitch is invisible. It is perfect for hemming and closing seams.
Machine Sewing For Beginners
Sewing with a machine can be faster and more precise. Here are the basic steps for beginners:
- Set Up: Place the machine on a sturdy table. Plug it in and turn it on.
- Thread the Machine: Follow the machine’s manual. Each machine has a specific threading path.
- Bobbin: Insert the bobbin. The bobbin thread should come up through the needle plate.
- Stitch Selection: Choose a straight stitch for most projects. Adjust the length as needed.
- Sewing: Place the fabric under the presser foot. Lower the foot and start sewing slowly.
- Finishing: Backstitch at the end of your seam. This secures the stitches.
These basic techniques will help you start your sewing journey. Practice each one to improve your skills.
Reading And Using Patterns
Learning to read and use sewing patterns is essential for beginners. Patterns guide you in cutting fabric pieces accurately and assembling them. This section will help you understand pattern symbols and how to alter patterns to fit your measurements.
Deciphering Pattern Symbols
Patterns come with various symbols that you need to understand. These symbols guide you in cutting and sewing your fabric. Below are some common symbols and their meanings:
| Symbol | Meaning |
|---|---|
 |
Grainline: Align this with the fabric’s grain. |
 |
Cut on Fold: Place this edge on the fabric’s fold. |
 |
Notch: Match notches to join fabric pieces correctly. |
 |
Dart: Sew along these lines to shape the fabric. |
Understanding these symbols will make your sewing process smoother. Always check the pattern instructions for additional symbols.
Altering Patterns To Fit
Patterns are made for standard sizes. You might need to alter them for a perfect fit. Follow these steps to adjust your pattern:
- Measure yourself accurately. Use a tape measure for precise measurements.
- Compare your measurements with the pattern’s size chart.
- Mark the adjustments on your pattern. Add or subtract length or width as needed.
- Use a ruler and pencil to redraw the pattern lines.
- Check the fit by making a test garment. Use inexpensive fabric for this step.
Altering patterns ensures your finished garment fits well. Practice will make you better at this skill.
Executing Fundamental Stitches
Learning basic stitches is essential for every sewing beginner. These stitches are the foundation of all sewing projects. Practicing them helps you get comfortable with your sewing machine and fabric. Let’s explore two fundamental stitches: straight stitches and zigzag stitches.
Practicing Straight Stitches
Straight stitches are the most basic and commonly used stitches. They are perfect for seams and hems. Here’s how to practice:
- Set your sewing machine to a straight stitch setting.
- Place your fabric under the needle.
- Lower the presser foot to hold the fabric in place.
- Start sewing by pressing the foot pedal gently.
- Keep the fabric aligned with the guide on your machine.
- Sew a straight line from one end to the other.
| Step | Action |
|---|---|
| 1 | Set machine to straight stitch. |
| 2 | Place fabric under needle. |
| 3 | Lower presser foot. |
| 4 | Press foot pedal gently. |
| 5 | Align fabric with guide. |
| 6 | Sew from one end to the other. |
Mastering Zigzag Stitches
Zigzag stitches are versatile and great for finishing edges. They prevent fabric from fraying. To master zigzag stitches, follow these steps:
- Switch your machine to the zigzag stitch setting.
- Place fabric under the needle.
- Lower the presser foot.
- Press the foot pedal to start sewing.
- Guide the fabric smoothly as the needle moves side to side.
You can adjust the width and length of the zigzag stitch. A wider zigzag is good for stretchy fabrics. A narrow zigzag works well for delicate fabrics.
Practice these stitches on scrap fabric. This helps you get a feel for your machine and improve your skills.
Troubleshooting Common Sewing Issues
Starting with sewing can be fun. But, you may face issues. Let’s solve some common problems together. This section will help you fix them.
Dealing With Thread Tension
Thread tension is crucial. It keeps your stitches even. Here are steps to fix thread tension:
- Check the Thread Path: Ensure the thread follows the correct path. Look at your machine’s manual.
- Adjust Tension Dial: Use the tension dial. Try small changes. Test on scrap fabric.
- Use the Right Thread: Match thread type to fabric. Heavy fabrics need heavy threads.
| Problem | Solution |
|---|---|
| Loose Stitches | Tighten the tension dial slightly. |
| Tight Stitches | Loosen the tension dial slightly. |
Fixing Skipped Stitches
Skipped stitches can be annoying. They ruin the look. Here is how to fix them:
- Check the Needle: Ensure it is the right type and size. Replace if bent or dull.
- Use the Correct Thread: Match thread with needle and fabric.
- Adjust the Speed: Sew at a steady, moderate speed. Avoid fast sewing.
- Check Bobbin: Ensure it is wound evenly. Rewind if necessary.
Follow these tips. You will sew with ease. Your projects will look great!
Finishing Touches And Decoration
Adding the final touches to your sewing projects can make them stand out. Finishing touches and decoration are essential for a polished look. This section will guide you through hemming garments and adding embellishments. These techniques will elevate your creations to a professional level.
Hemming Garments
Hemming is crucial for a neat garment finish. It prevents fraying and ensures durability. There are several types of hems. Let’s explore a few common ones:
| Type of Hem | Description | Best For |
|---|---|---|
| Double Fold Hem | Fold the edge twice and sew. | Casual and formal wear |
| Blind Hem | Stitch is invisible from the front. | Dress pants and skirts |
| Rolled Hem | Creates a narrow, rolled edge. | Lightweight fabrics |
Follow these steps for a double fold hem:
- Measure and mark the hem length.
- Fold the fabric edge up 1/2 inch.
- Iron the fold to set it.
- Fold the edge up again 1/2 inch.
- Iron and pin in place.
- Sew close to the inner fold.
Adding Embellishments
Embellishments can transform simple projects into unique pieces. Common embellishments include buttons, beads, and embroidery. Here’s a brief guide on how to add these elements:
- Buttons: Choose buttons that match your fabric. Sew them on with a needle and thread. Use a buttonhole foot if your machine has one.
- Beads: Thread beads onto your needle. Sew them in place where desired. Ensure they are secure.
- Embroidery: Use an embroidery hoop to keep fabric taut. Follow a pattern or create your own design. Use different stitches for variety.
Adding these details can make your sewing projects more attractive. Take your time with each step. Enjoy the process of making your creations beautiful.
Next Steps In Sewing
Once you’ve mastered the basics of sewing, you’re ready for the next steps. This phase involves advanced projects and joining sewing communities. These will enhance your skills and keep you inspired.
Advanced Sewing Projects
Advanced projects challenge your skills and creativity. Start with simple items like:
- Clothing alterations
- Quilting
- Custom curtains
These projects will help you learn new techniques. Consider making a tailored shirt or a lined jacket. Use high-quality fabrics for best results.
Here is a simple table to help you choose your next project:
| Project | Skill Level | Materials Needed |
|---|---|---|
| Tailored Shirt | Intermediate | Fabric, Buttons, Thread |
| Lined Jacket | Advanced | Fabric, Lining, Zipper |
| Quilt | Intermediate | Fabric Scraps, Batting, Thread |
Joining Sewing Communities
Sewing communities are great for learning and sharing. Join these groups to find like-minded people. They offer support and inspiration. Here are some ways to get involved:
- Local sewing clubs
- Online forums
- Social media groups
These communities can answer your questions. They also share patterns and tips. Participating in these groups will make sewing more fun. Here are some benefits of joining:
- Meet new friends
- Learn new techniques
- Share your work
Don’t hesitate to join a sewing community today. It will greatly benefit your sewing journey.
Credit: www.thesimplelifecompany.com
Conclusion
Embarking on your sewing journey can be truly rewarding. Start with basic tools and simple projects. Practice regularly to enhance your skills. Join online forums and communities for tips and support. Remember, patience and persistence are key. Happy sewing, and may your creativity flourish with every stitch!


